


Oyster mushrooms are some of the easiest varieties of mushrooms to grow. Popular in many Asian style cuisines like donabe pots or other stews, oyster mushrooms hold their integrity well in soups.
These delicious mushrooms also act as an excellent meat replacement because of their chewy texture and tasty size.
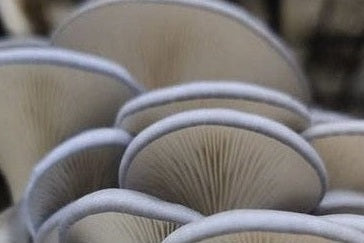
Oyster mushrooms are soft with a bittersweet aroma reminiscent of anise. When cooked, they have a mild and nutty, seafood-like flavour.

Where do you Position a Mushroom Kit?
Choose somewhere humid if possible - bathrooms with some ambient lighting work well as they tend to be more humid, especially if the bathroom is used for showers. Areas of the house with ambient lighting but without heating or cooling systems that remove moisture from the air are ideal. One of the primary factors in getting good results when growing your own mushrooms is maintaining a humid environment.
Unlike button or field mushrooms, the gourmet varieties need light to grow properly - varieties such as Yellow Oyster will not grow yellow without lighting. Ambient natural lighting is best, but fluorescent or LED lighting also works well.
Do not place the mushroom grow kit in direct sunlight as this will dry the block out and it will not fruit. Mushrooms grow best at temperatures between 14-26C, while varieties such as the Pink and Yellow Oysters can grow at temperatures up to 30-32C.
How do you Setup a Mushroom Kit to Get Started?
All mushroom grow kits have a mark where the mushroom grow bag should be cut. The mark that has been made is specific to the variety. Use a clean sharp knife - a box cutter or scalpel works well otherwise a sharp kitchen knife will do the job. Try not to cut the block - the aim is to just cut the plastic without damaging the substrate.
Make the cut the size of the marking on the block, try not to cut into the substrate. The goal is to just cut the plastic without damaging the block.
Don't expose the block or pull back the plastic in any way, the cut is only to expose the mushroom block to oxygen.
How do Mushrooms in a Kit Start to Grow?
Mist the cut 2-3 times per day with a
spray bottle. This misting is not to water the block, the mushroom block already has all of the water it needs to grow inside it. The misting is simply to try and increase the humidity around the cut, and to keep the mushrooms humid as they start growing.
The mushroom block will start to produce pins (little mushrooms) through the cut in the plastic, which will naturally force the cut open to grow the mushrooms. Keep misting 2-3 times per day until the mushrooms are ready to harvest.
Mushroom Kit Harvesting Time Guide
Different varieties grow at different speeds, and there is no exact time frame as the average temperature the block has been exposed to will affect the speed. Below is an approximate time frame for the different varieties between step 1 and harvest:
Blue Oyster: 7 - 12 Days
Phoenix Oyster: 6 - 9 Days
Yellow Oyster: 6 - 12 Days
Pink Oyster: 6 - 10 Days

When are my Mushrooms Ready to Harvest?
The timing of harvest is not determined by their size but rather the shape of the mushroom cap. With all of the oyster varieties, harvest them when the outside of the mushroom cap is still slightly downturned. If the caps start flattening or upturning they will be more fragile and have less fridge life.

How Do I Harvest Kit Mushrooms?
The best way to harvest mushrooms is to get a
sharp knife and cut them off as close to the mushroom block as possible, without cutting into the block.
Try to cut as little of the plastic as possible as this helps keep the block humid for subsequent flushes.
Once the mushrooms are removed, cut off any excess mushroom material (the bases, leftover mushrooms etc) as this will decompose, affecting subsequent flushes.
How to Store Homegrown Mushrooms
A sealed container in the fridge with some paper towels in it to absorb moisture works best. Freshly harvested mushrooms will last 1-2 weeks in the fridge.
Additional Flushes
Mushroom grow kits will continue to make mushrooms with the right care. The oyster varieties will get anywhere from 1-4 flushes depending on their environment and level of care.
To stimulate a second flush, continue to mist the block, and after the block rests for a short period of time (anywhere from 3-7 days) there will be new pins and the next flush. It is important to keep misting, keeping the humidity up otherwise the block will dry out and the process will stop.
On the 3rd or 4th flush the block may start to look too dry - soak the entire block and plastic packaging in water for 12 hours to try and get some moisture back into it. Once the mushroom block has stopped producing flushes it can be added to the garden - mushroom compost is great!
We'd love to know how your mushroom grow kit is going! Share your pictures and comments here or on social media tagging #urbanrevolution.
With thanks to The Mushroom Guys!


Leave a comment (all fields required)